An Introduction to Group Pose (GPose) in FFXIV
Group Pose (GPose) is a feature in Final Fantasy XIV that allows you to pose, frame, and take gorgeous screenshots in game. Despite the name, it’s useful both alone and as a group. However, it can be quite daunting the first time you try to use it. Well fear no more, for I will help you unlock the secrets of GPose and better FFXIV screenshots!
How To Take Screenshots
First things first, you need to know how to take screenshots. Otherwise, how are you going to save your work? The easiest way is to do this is to use the in game screenshot feature. By default the screenshot button is [Print Screen]. You also need to know where these screenshots end up. This is set inside of System Configuration -> Other Settings.
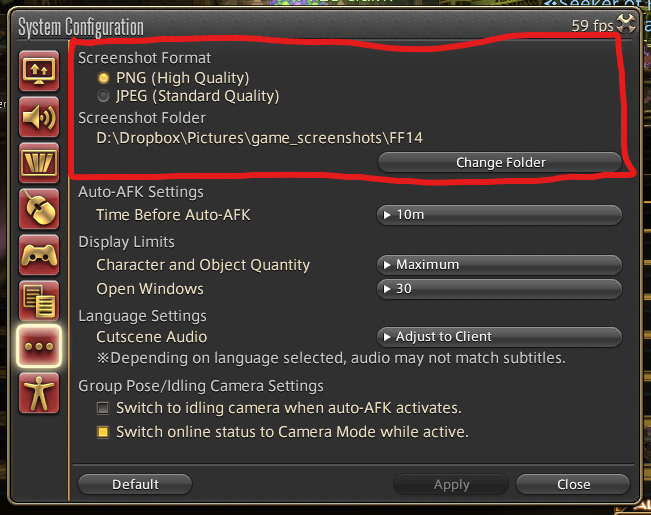
The top option allows you to change the image format that will be used for your screenshots. The second option lets you set where they will be saved. I suggest setting this somewhere in your normal files that is easy to find. Now that you have a way to take screenshots, let’s get into how to get some good ones.
Removing the UI
Before we dive into GPose, one very useful tip. You don’t always need GPose to get great screenshots. If you hit [Scroll Lock] on your keyboard, it will remove the HUD from your screen. Hitting it a second time will bring the HUD back.
With the HUD gone you can control the character and camera as normal, and easily take screenshots without the UI in the way. This is also useful to get clean screenshot in cutscene. Hitting [Scroll Lock] while in a cutscene will remove the text box, leave just the pretty framing and gorgeous characters for you to screenshot to your hearts content. No more trying to time screenshots between text boxes!
But what if you want to pose a character just right while emoting, or take your time to frame the perfect shot? That’s where GPose comes in.
Location, Location, Location
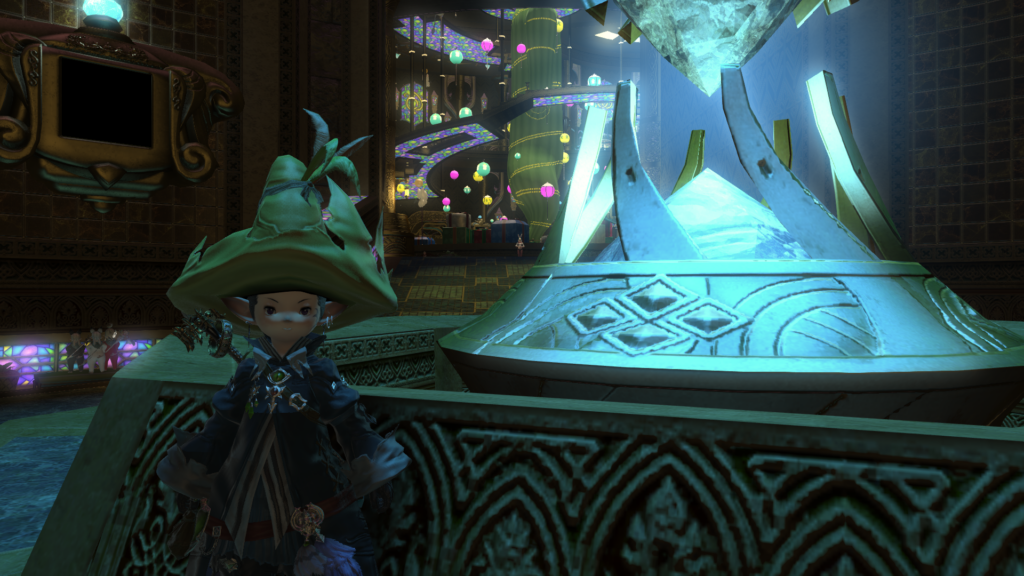
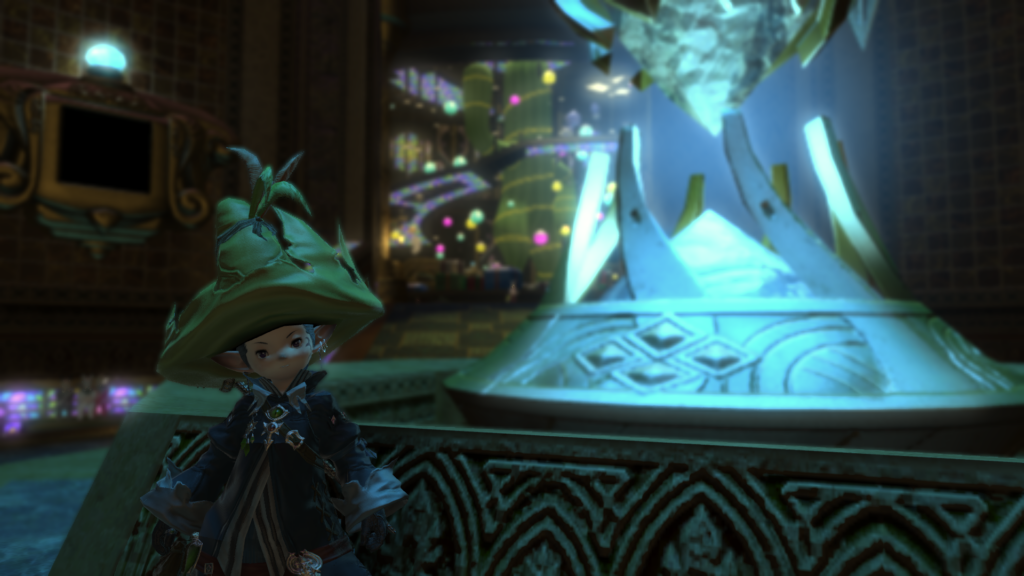
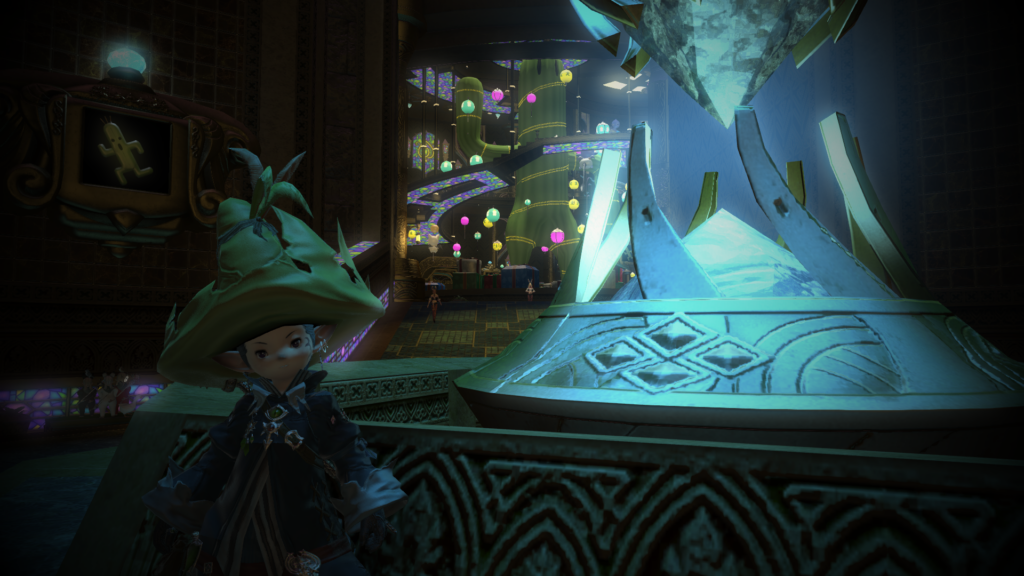
To get a good shot you need a good location. Where your character is standing is where they will be during the GPose. This goes for your friends around you too. Take a minute to look around and find a spot with is a good background. Place your character and face them towards where you want the camera to be. Once you’re happy with where your character is and the direction they’re facing, you’re ready to start GPosing!
Taking Your First GPose Shot
To open GPose type “/gpose” in chat and hit enter.

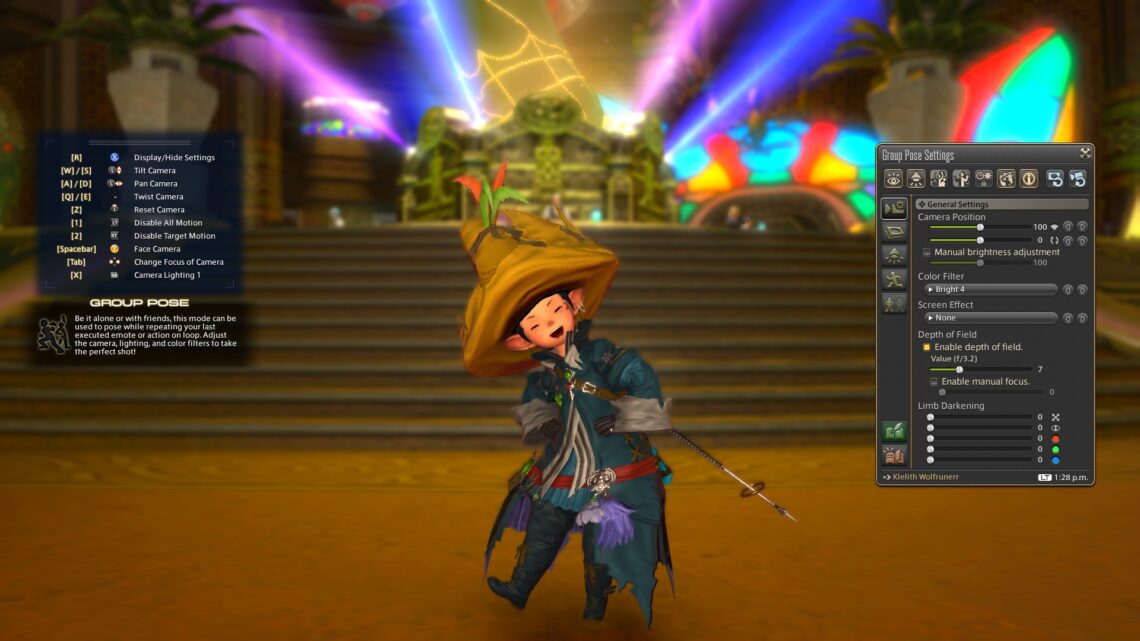
You will be loaded into GPose, and it should look something like the below. If you don’t like the positioning of your character after GPose loads, you can hit escape to quit and try again.
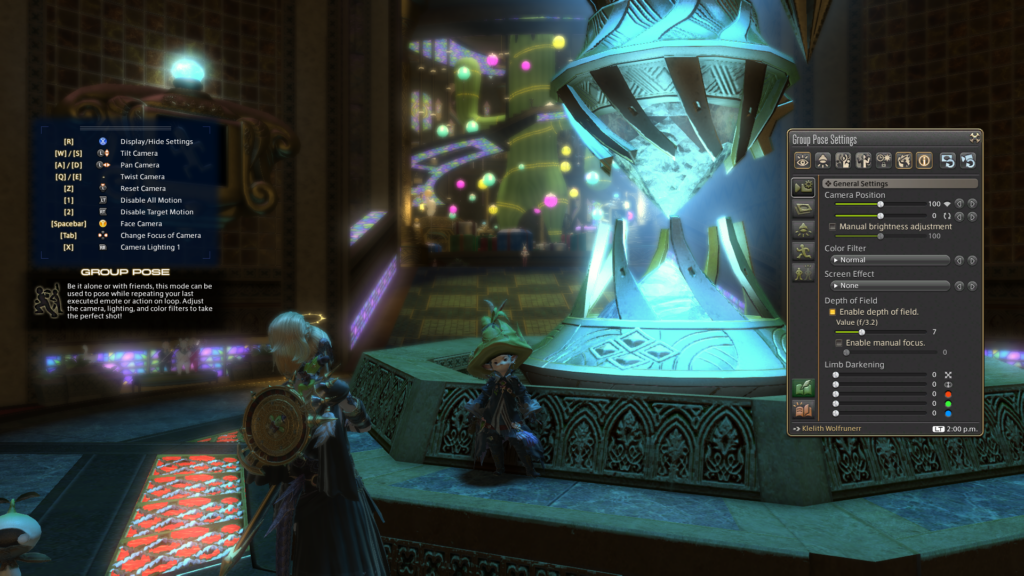
Now that you’re in GPose, the initial impression can be a little overwhelming. Don’t panic, you got this!
On the left is information on controls, on the right are all the GPose settings. Ignore the settings for now, there’s a lot of them and we’ll go through a few later. For now, you should focus on camera control and framing.
Use your scroll wheel to zoom in/out, WASD to pan & tilt the camera around, and click & drag with the mouse to rotate around your character. Play around until you get something you like. If there’s other characters in your GPose, you can click on them to make them the center of rotation. This can sometime help you get a better angle you can’t get from your own character’s position.
Keep in mind, you don’t need to have your character centered. Photos often look better with your character off to one side.
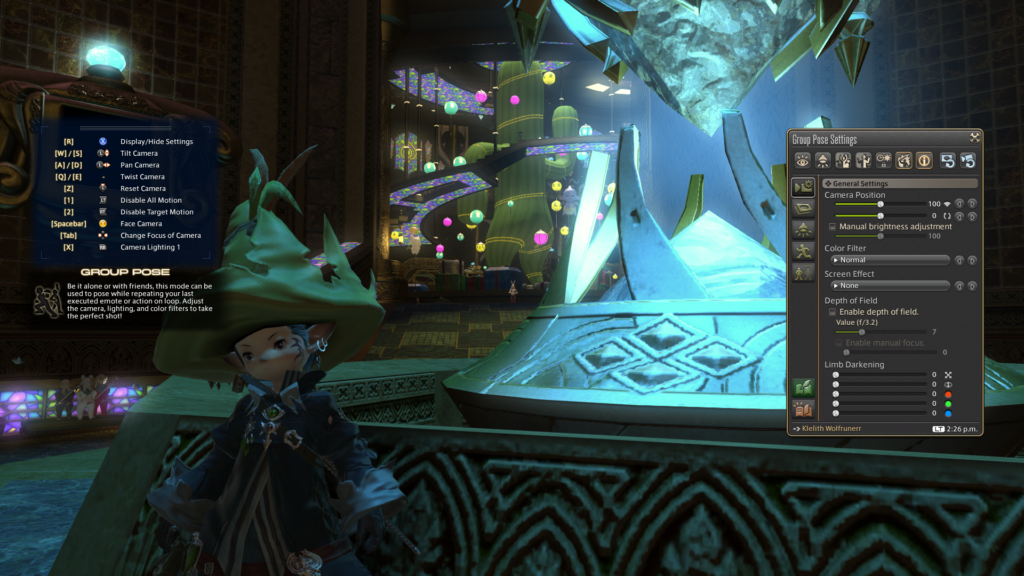
Okay, you have a cool framing but there’s two problems. First, your character isn’t facing the camera anymore. Second, the GPose UI is in the way. Let’s fix this.
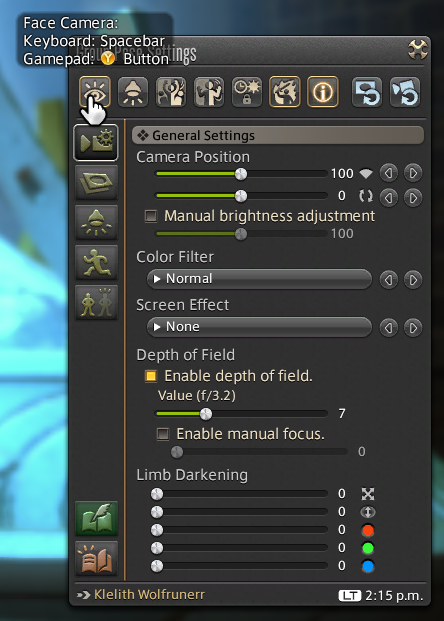
To have your character face the camera, there’s a setting you can toggle. By default, face camera is on, but it only faces the initial camera position. To make your character face the current camera position, toggle the Face Camera setting off and back on. You can do this by either using the hotkey listed in the controls guide, or clicking the eye shaped icon in the settings pane.
To get rid of that pesky UI just hit [R]. To bring it back, hit [R] a second time. With the UI gone, hit [Print Screen] and snap that shot!
And that’s pretty much it, you’ve taken your first steps into GPose. With just the basic controls, good location choice, and some patience, you can go a long way.
What’s that, you want to learn more? Okay, let’s do it!
Emotes
Emotes are the lifeblood of GPose. There’s only so many blank faced character screenshots you can take before it gets a bit stale. There are two ways to get emotes into GPose.
The first is to emote right before opening up GPose. This works for both your character and others’. The last emote a character did before opening GPose will be repeated while you are within GPose. This goes for any friends in the shot too. Have them emote, open GPose, and there you go, everyone is having a great time emoting away while you take your glamour shots!
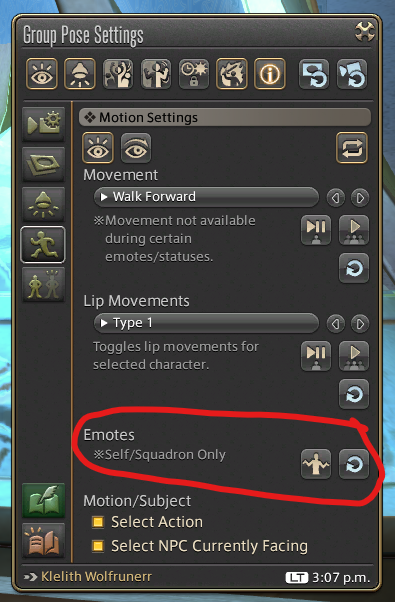
The second way is to override the emote from within the GPose settings. Under Motion Settings you can click the Open Emote List button to see a list of all your emote. Select a new emote to override your character’s current emote. This only works for your own character, not others.
Keep in mind you can stack “Expressions” with almost any other emote. Want to have your character sneering while doing the pose command? Just run them back to back and they should both take effect simultaneously while in GPose.
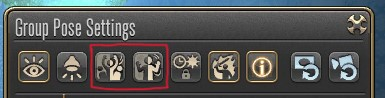
Finally, there’s two useful toggle buttons at the top of the settings screen. “Disable/Enable All Motion” and “Disable/Enable Target Motion”. These can be used to pause emotes at just the right time. “Disable/Enable All Motion” pauses/unpauses all characters/objects in the scene at once. “Disable/Enable Target Motion” does the same but only for the currently selected character/object. To select another character, just click on them. With some patience, you can use this pause/unpause to get everyone in the perfect pose for your shot.
Advanced Techniques
Depth of Field
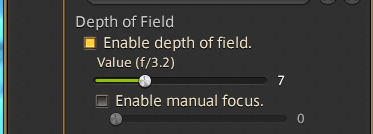
The depth of field setting can go a long way to bring some character to your shot, and pull the attention of the viewer where you want it. The lower the number the thinner the focal plane will be. The higher the number, the thicker is will be. You can think of the focal plane as a slice parallel to the screen with some amount of thickness placed at a distance centered on the focus point. Anything in this plane will be in focus, objects outside this plane will become progressively more out of focus as distance from the plane increases.
If that made no sense to you, the easiest way to think about it is the lower the number the more blurred the background will be.
There’s also a manual focus if you don’t want the default of focusing on the selected character.
Color Filter
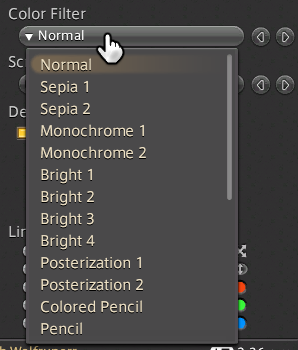
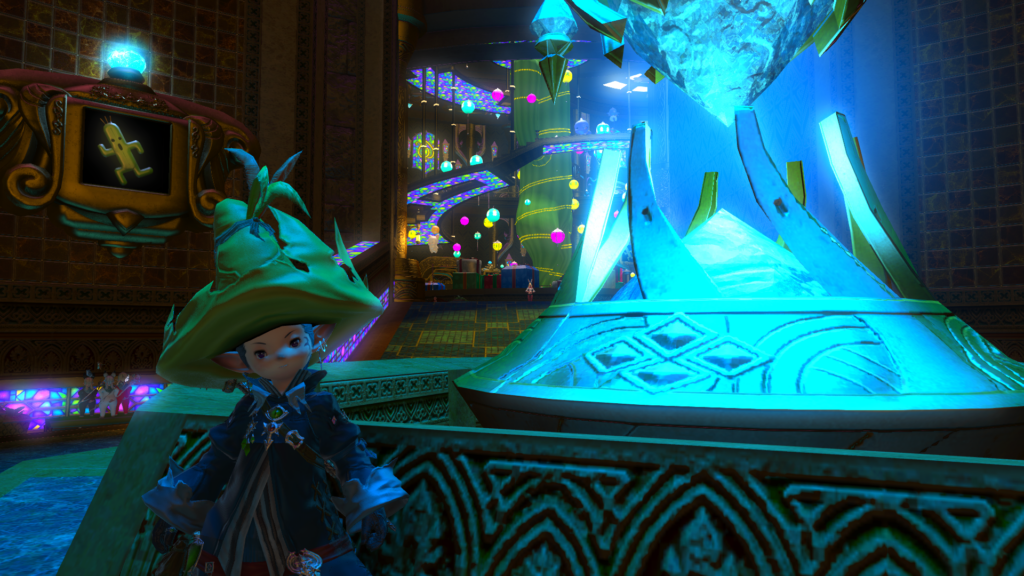
The color filter will modify the colors in the scene with some interesting effects. The “Normal” setting matches what you see outside GPose. Try Bright 1 through 4 to add some nice saturation and pop to the colors. I find myself using Bright 1 or Bright 4 the most, but use whatever you think looks good for the shot. And don’t be afraid to experiment with the other options.
Limb Darkening (Vignetting)
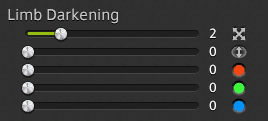
Limb Darkening (also known as Vignetting) darkens the edges and corners of the picture. This effect can really add some mood to your screenshot, just don’t overdo it (unless that’s what’s you want, I’m not your boss).
You can also change the color, but I find black is usually the way to go.
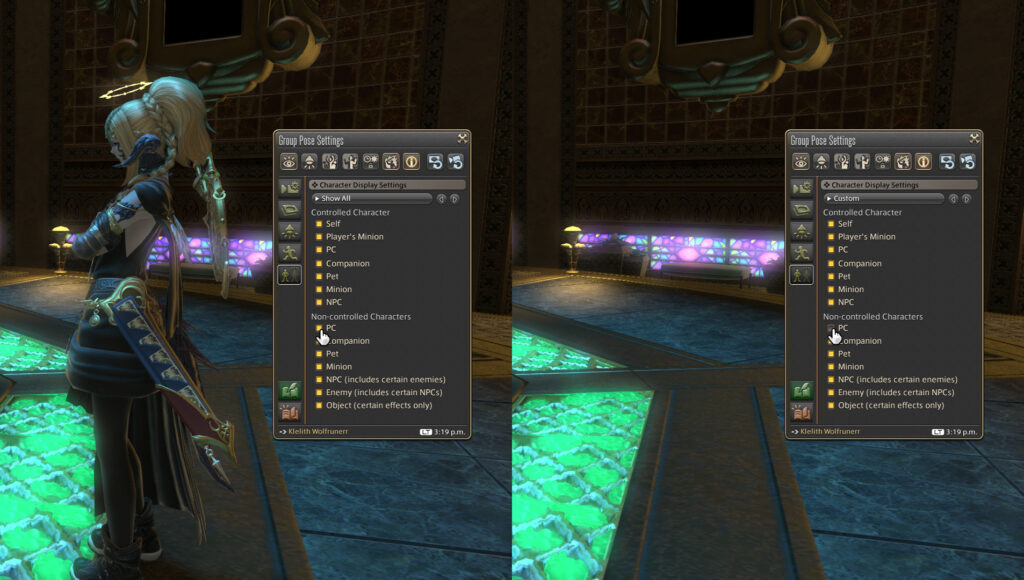
Character Display Settings
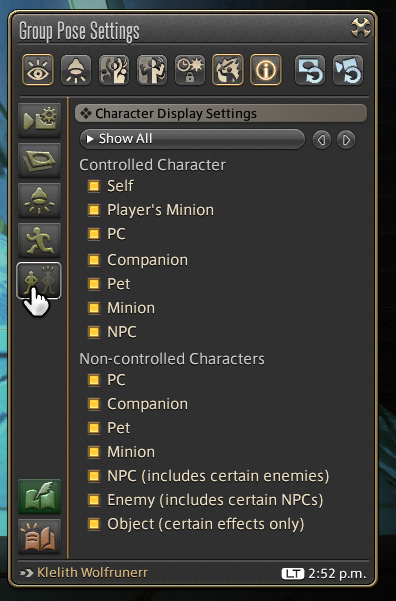
There’s a whole tab of display settings. This lets you turn on and off minions, pets, other players, etc. Is something in the way ruining your shot? Get rid of it!
Lighting

There’s a whole tab of lighting controls. You get three lights to use however you want. Full usage and tips on lighting would fill it’s own guide. It’s a very weird, but powerful lighting system.
The one tip that’s worth mentioning is that the lights get placed at your current camera position. I didn’t realize this for the longest time. Want a light behind your character? Move the camera behind them, click to add the light, and then move the camera back to frame the shot. The light will stay where your camera was at the time it was turned on.
Remember, It’s About Having Fun
I hope this has wet your appetite for taking FFXIV screenshots in GPose. The best advice I can give is go out there, have fun, and play around with all the settings. Not sure what you like? Try multiple things and save all of them. Screenshots are cheap!
Happy GPosing!